Inserting Bookings into an Itinerary can be done in two different ways:
- Drag and drop the Supplier in from the Supplier Menu. This is a fast and effective method of building an Itinerary when you know exactly which Supplier/s you wish to use in your Itinerary.
- Search for a Supplier. This method is useful if you want a list of certain services that match your search criteria. You can search for all the Services in a particular City. Or, more specifically, you can search for all Services in a city that have been categorised by the Grade function e.g. All 4-Star Accommodation in Auckland.
Drag and Drop Method
- Find the Supplier that you require from the Supplier Menu or by typing the first few letters of the Supplier name to short cut to it (within your selected folder). Please note that the folder must be expanded first for this to work.
- Once the Supplier is selected, click on the Supplier, holding the mouse button down as you drag it into the itinerary Bookings List in your work space.
- Drop the Supplier anywhere into the Bookings List and Tourwriter will display the Add new booking popup window.
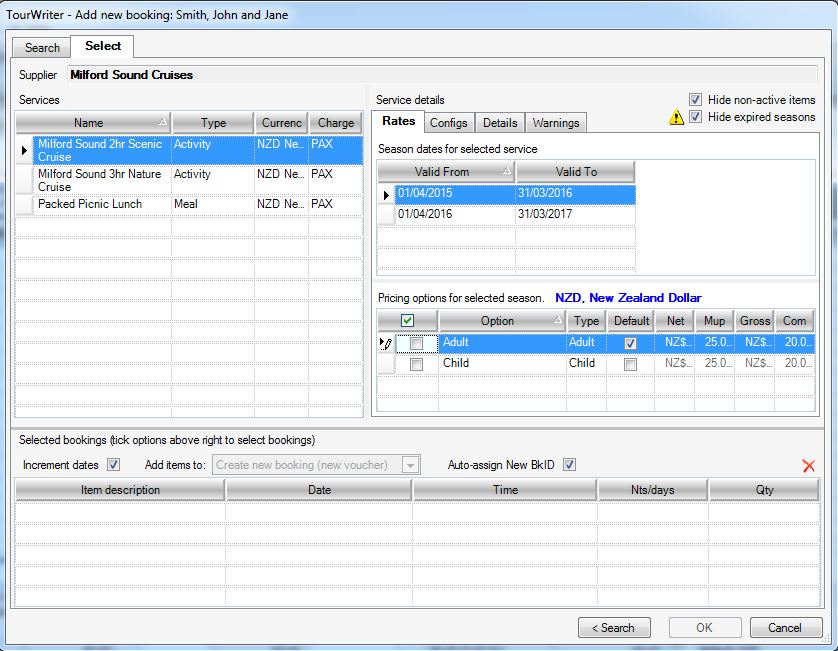
Click image to enlarge - Select the Service you require under Services field on the left hand side of the window.
- Your season on the Rates Tab will be automatically highlighted (from the Season dates for selected service), based on the Itinerary dates. If no valid seasons are available, click the Cancel button (bottom right corner). You must then open the Supplier concerned and edit (add) the Season dates for the selected service and the Pricing options for the selected season. If rates are not known, Tourwriter will allow you to select a different (incorrect) season, however a red warning
 will be displayed.
 - Select (tick) the required Pricing option. Ticking an Option will display the Service and option information into the Selected bookings field (below) of the window.
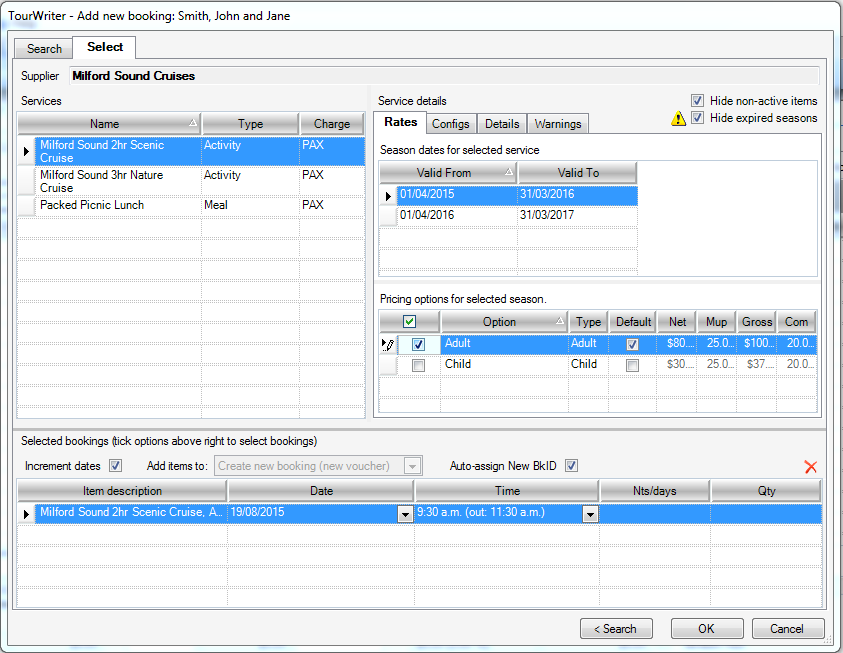
Click image to enlarge - If you are adding another Service from a Supplier that is already in your Itinerary, the Add items to option will be available to use. Here you can choose to create a new Booking ID (if Auto-assign New BkID is not ticked), which will allow you to produce separate vouchers for the two Services.
- Once you have selected the Service/s you wish to book, make sure that all the fields (i.e. Date, Time, Nts/days (if applicable) and Qty) are populated with the correct information for your booking. Please note that all Services priced on a ‘per night’ or ‘per day’ basis (e.g. Accommodation, Rental Cars and Coaches) will require the Nts/days field to be populated.
- Click ‘OK’.
- Tourwriter will insert the selected Service/s into the Bookings List Tab.
- Save your changes (the ‘BkID’ will appear as a negative number until you save the booking). Once the new booking has been saved, a unique ‘BkID’ will be generated for this booking.
NOTE: While adding a booking to an itinerary, the season is auto-selected. You can only switch between Service Options in the Rates tab. If you select a different season than the one automatically selected, the rates will not update on the Bookings tab.
Search for a Supplier Method
- Click the
 on the top right corner of the Bookings List, which will bring up the Tourwriter – Add new booking window. If you have a Booking Item highlighted when you perform this function, the Select Tab will be open in the window, so you will need to change to the Search tab. If you are starting a completely new Itinerary the Search Tab will be available to you immediately upon clicking on the .
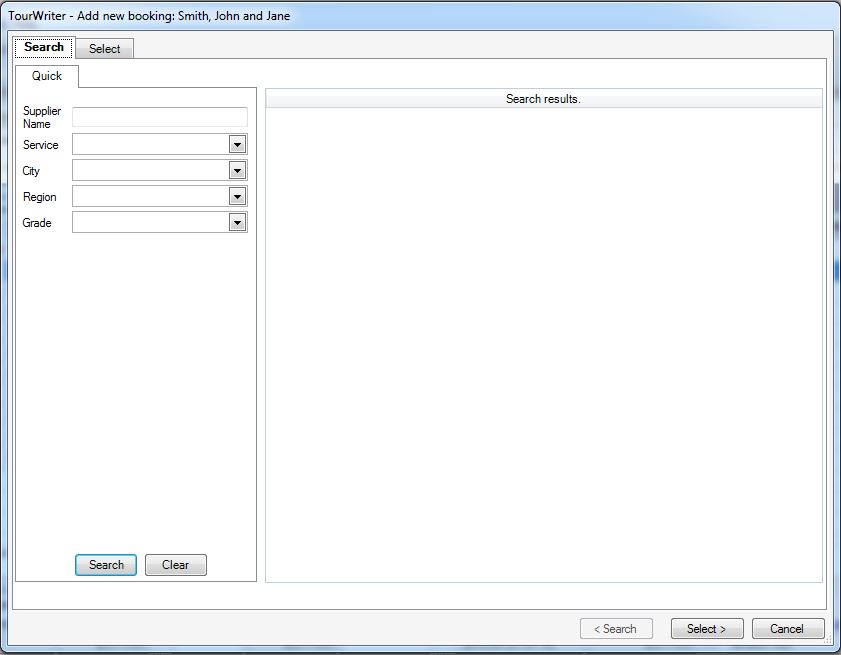
- Type in the full or partial Supplier Name and press Enter or click the Search button below.
- For a more refined search, use the drop-down arrow/s to populate the field/s (i.e. Service, City, Region and Grade) you would like to utilise for your Search. Once you have populated the search fields click the Search button below.
- To begin a new Search click the Clear button and repeat the process accordingly.
- Once you have found the Supplier you wish to use, double click on (highlight) the required Supplier and Service fields on the right (or highlight the required Supplier and Service fields and then click on the Select button below) . This will open the information in the Select Tab so that you can then add this Service to your itinerary.
- Your Season will be automatically selected, based on your Itinerary Dates.
- Tick the required Pricing Option. Ticking a Pricing Option will populate the relevant fields in the Selected bookings area of the window.
- Once you have selected the Service/s you wish to book, make sure that all the fields (i.e. Date, Time, Nts/days (if applicable) and Qty) are populated with the correct information for your booking. Please note that all Services priced on a ‘per night’ or ‘per day’ basis (e.g. Accommodation, Rental Cars and Coaches) will require the Nts/days field to be populated.
- Click ‘OK’.
- Tourwriter will insert the selected Service/s into the Bookings List Tab.
- Save your changes (the ‘BkID’ will appear as a negative number until you save the booking). Once the new booking has been saved, a unique ‘BkID’ will be generated for this booking.
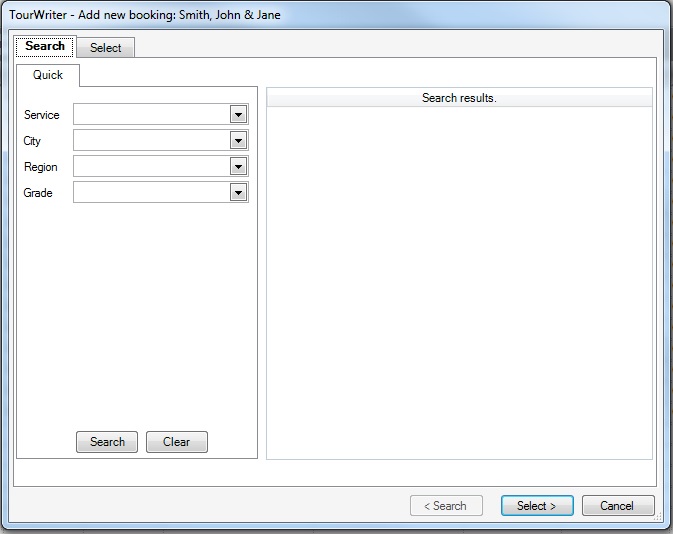
Both of the Search and Select Tabs are available when you add a booking in either action. You can simply select either tab, or click the Search or Select button at the bottom of the window.
![]()
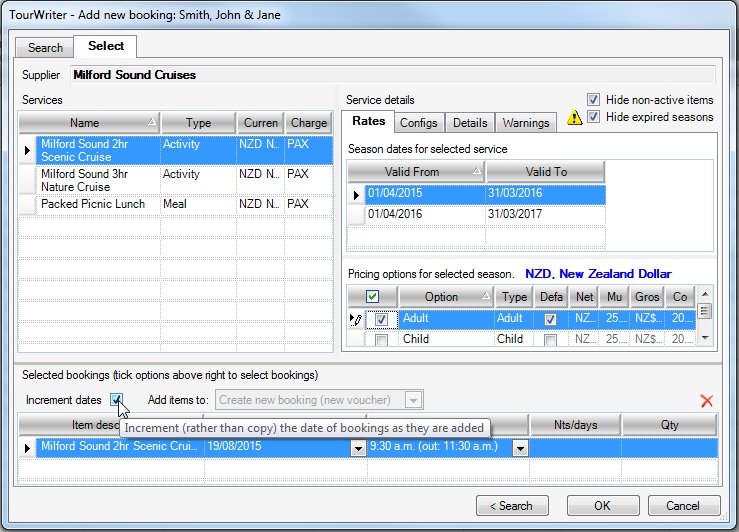
Increment Dates
The first booking added to the Bookings List Tab will default to the Itinerary Start Date. When adding subsequent bookings, it is possible for Tourwriter to calculate the next booking date if the increment dates box is ticked. This is ideal if you are adding all Accommodation bookings to the Bookings List first, then adding Activities and Meals. For example:
- Starting with a blank Bookings List, add the first Accommodation Service and Option. The check-in date of the Accommodation booking will be the same as the Itinerary Start Date. Enter the booking Time, Nts/days and Qty. Click the Select Tab above.
- Add the next Accommodation service and option. Before selecting the Pricing Option, tick the Increment dates box.
- Select the Pricing option for selected season, and Tourwriter will automatically calculate the second booking’s check-in date, based on the previous booking’s check-out date.
If Increment Dates is not ticked prior to selecting a Pricing option for the selected season, Tourwriter will apply the same Start Date to the booking that was applied to the last booking that was added.
Tourwriter will remember your last used settings so many users will use this feature for some booking service types (e.g. Accommodation), but turn it off for other booking types (e.g. Activity and Meals).
Auto-assign New BkID
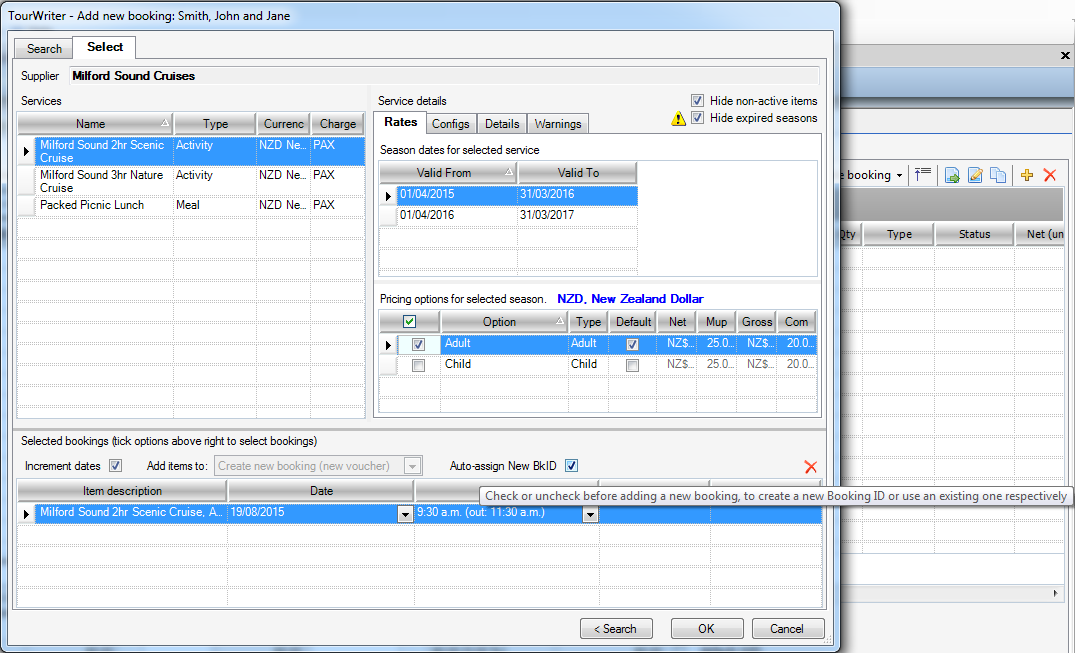
If the Auto-assign New BkID box is ticked, Tourwriter will assign a unique Booking ID to the Service (once it is included in the Bookings List and the Itinerary file is saved). If multiple Services from the same Supplier are added at one time, Tourwriter will assign unique Booking ID’s to all Services.
This box must be ticked/unticked before a Pricing option is selected in order for a unique Booking ID to be created, or conversely, for a Booking to be added to an existing Booking ID (via Add items to). Once ticked/unticked, Tourwriter will apply this setting across all Suppliers.

Bookings can also still be linked/unlinked within the Booking Items List.
Selecting Multiple Services Under One Supplier
In the Tourwriter – Add new booking window, the Services provide by the Supplier you have selected are listed in Services field. Select the first service that you wish to add and tick the Pricing option required to populate the Selected bookings’ list at the bottom of the window. To add your next Service to the same booking, select the next Service that you wish to add and again tick the Pricing Option required. Now both Services will appear in the ‘Selected bookings’ area.
Please note that these bookings will automatically have the same Booking ID (BkID) unless the Auto-assign New BkID box is ticked. If this is ticked, each Booking item will have its own individual Booking ID.