The Edit Publishing functionality lets you review your content before publishing it. Currently, you load your data & images for a Supplier or a Service content in the Publishing Content subtab within a Supplier. Edit Publishing extends the current functionality to let you amend the content within an Itinerary before pushing it to Minim.
The Edit Publishing Functionality will need to be enabled on your Tourwriter database. Please speak to your Customer Success Executive to learn more.
Choosing a Default Publishing Content
You can include additional description to your Itinerary through Content types. By choosing a Content type, you define your content to be in one of several progressive itinerary stages, like Quotation, Final and so on. Likewise, the language the report displays in can be listed as a Content type if you are dealing with multiple languages. For instance, Final German and Final Spanish are defined as two Content types. The new Is Default column lets you select your default Content type. Let’s take a look.
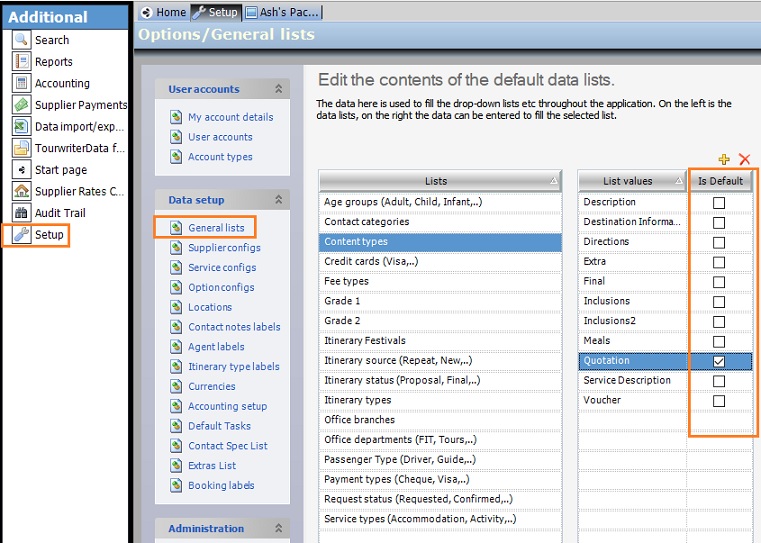
- Navigate to General Lists which is found in Tools > Setup > General Lists.
- Highlight Content types to view the pre-populated Content types List values.
- Choose a Content type value as your default. The new Is Default field lets you do that.
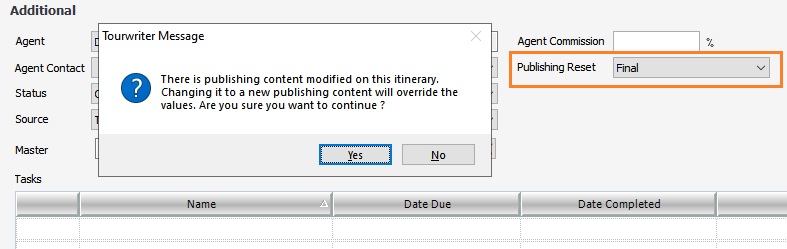
- On opening an itinerary, the Publishing Reset drop-down displays the default Content type.
Note: The Content type chosen through the Is Default field becomes the default Publishing Content option for all your itineraries. Once set, the Publishing Reset field cannot be blank.

- Either continue with the default Content type or override it by selecting a different Content type from the Publishing Reset dropdown. When overriding the default Content type, you are prompted to confirm your selection.
Note: Choosing a new Content type overrides information saved in the previous Content type for all existing publishing that has not been locked. If you wish to save information for both the Content types, create a copy of the itinerary.
The Edit Publishing Content Window
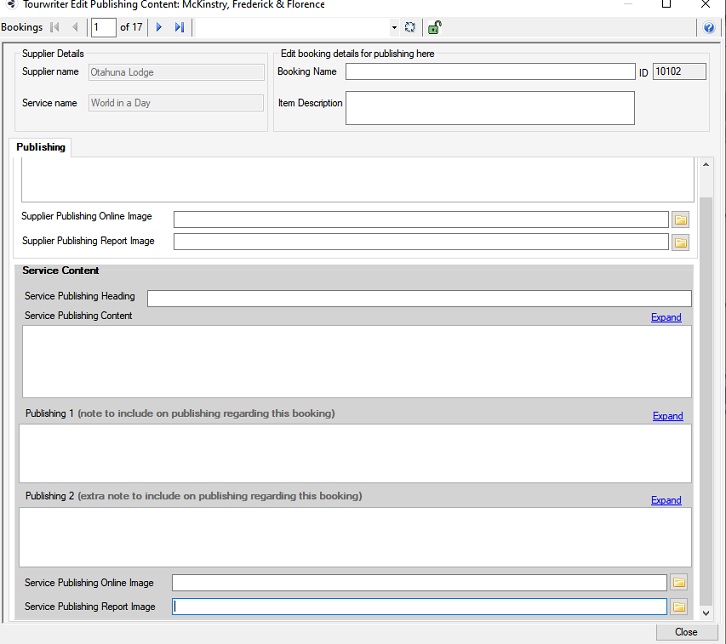
The Edit Publishing window displays the content that can be pushed to Minim. The window also lets you update the Supplier and the Service Content along with Publishing Note 1, Publishing Note 2 fields. Follow the steps below to access the Edit Publishing window:
- Right-click a booking item in the Bookings List tab of an Itinerary and select Edit Publishing Content.

- On the Publishing Content window, edit the Booking Name and the Item Description fields. The content for these fields is copied from the fields with the same labels in the Bookings tab.
Note: If the text in the Booking Name and the Item Description fields in the Edit Publishing window are edited, the Booking Name and the Item Description fields in the Bookings tab won’t reflect edits.
- Enter content for the Supplier by loading Heading, Content, Online Image and the Report Image field.
- Follow the same steps to load Service content.
Note: Unlike the Booking Emailer window that groups bookings by Booking ID, the Edit Publishing window displays all bookings. Bookings with the same Booking ID, accordingly displays on separate Edit Publishing records.
- Click the Refresh button
 to restore content to its original values.
 - Click the Lock icon
 to save the Content type information. After adding text to the Supplier and Service content fields, lock it to prevent a Publishing Reset from overwriting the Content type data.
- For instance, say your default is set to Quotation. Edit the content and leave the Edited Booking Content unlocked , when you later opt for a different Content type (Final) through a Reset, it overwrites the data for the Final Type.
- For instance, say your default is set to Quotation. Edit the content and leave the Edited Booking Content unlocked
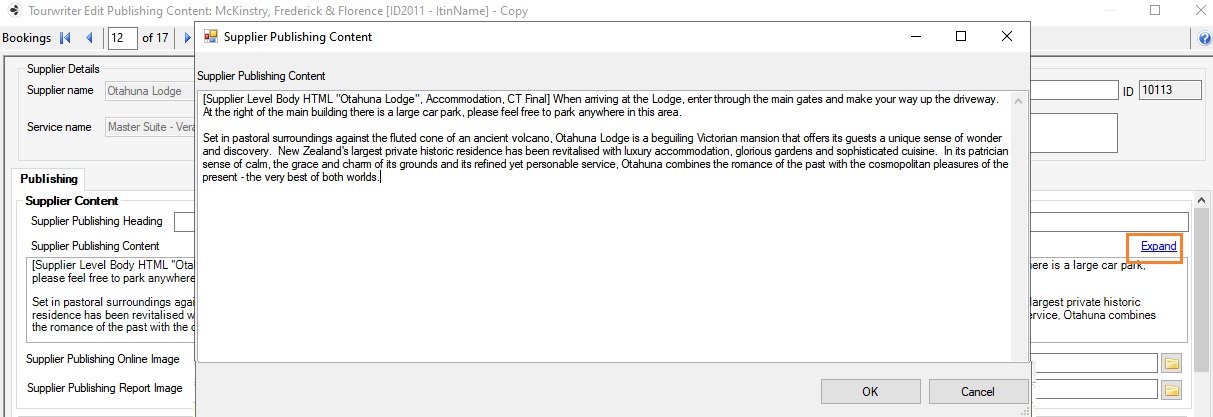
- Each content field can be expanded to zoom into the text by opening it in a separate window. Click Expand to open a larger window.
Note: At some point, you may want to load a Content type other than the default type selected for the itinerary. You can select a different Content type by picking the new content from the Publishing Reset dropdown on the Itinerary tab. However, if your old content isn’t locked, Publishing reset will delete existing Publishing Content and replace it with the newly selected Content type.
Push to Minim Settings
A Publishing Types subtab is now available on your Push to Minim settings. The subtab lets you map Tourwriter Content type fields to fields in Minim. Existing mappings for Check-In, Address, Locations and so on remain intact. To refer to current Tourwriter-Minim field mappings, visit Tourwriter-Minim Integration. Below are the steps to perform mapping in the Publishing subtab.
- On the Bookings tab of an itinerary, head to Tools > Push Itinerary to Online… to open the Upload Itinerary pop-up.
- Click on the Push to dropdown menu and select Minim
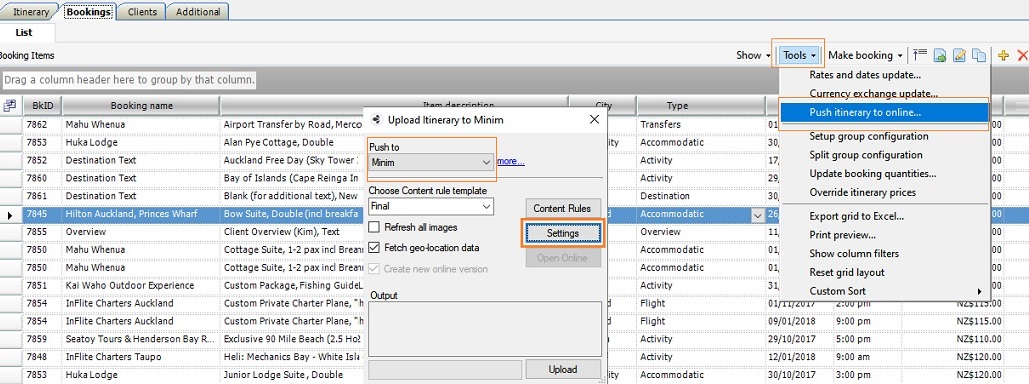
- Select Settings to open Minim Setup.
- Under the Mappings section, switch to the Publishing Types subtab.
Note: The Mappings section displays two other subtabs, Service Types and Status Types. To learn more, refer to the Mappings section in the Tourwriter-Minim Integration article.
- Click the dropdown under Tourwriter field to see a list of Edit Publishing fields. In the screenshot, Edit booking name maps to the Booking name field on the Edit Publishing window.
- Note: When you first open the subtab the Tourwriter field column will be set to blank. You must map each Minim field to a corresponding Tourwriter field from the dropdown.

- Confirm the Tourwriter fields mapped to Minim fields and click Save to close the Minim Setup window.
- Even though you can select your choice of mappings, an ideal Publishing Types mapping looks like below:

- Select Content Rules to review the chosen Content Rule template.
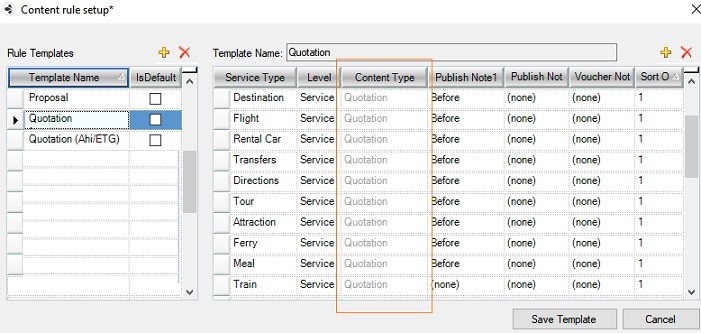
Note: When you enable Edit Publishing, the Content type field on the Content rule setup window grays out. The graying out is to prevent you from selecting a different Content type than the one selected in the Itinerary > Publishing reset.