Tourwriter introduces two new fields to categorise and differentiate itineraries. They are labelled Type 2 & Type 3 on your database and allow additional customisation wherein you can list drop-down options for the Type 2 field. The Type 3 field lets you select a date mapped to the Type 2 field.
The new fields cater to additional requirements. For example, they can be used to trigger certain information to appear on your publishing documents. Or they can be used to define trip names or define Terms & Conditions and so on.
Configuring the new Itinerary fields
The new fields are configurable in the Setup area. The fields are customisable and you can rename them to any customised name. To configure your new itinerary fields:-
- Head to Tools > Setup > Itinerary type labels. Two customisable fields are displayed.
- Add a label to each of the fields.
Note: The second field accepts information in date format so make sure to label it accordingly.

- To populate the drop-down options for the first field, go to Tools > Setup > General Lists. The recently labelled field appears as an option with a prefix “Itinerary”. For example, the field labelled Festivals in the example above is shown as Itinerary Festivals.
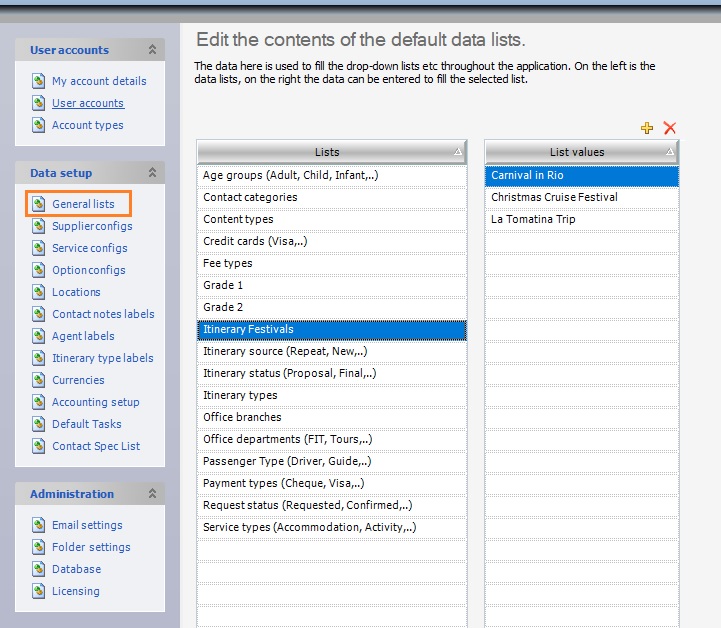
Note: For more information on General Lists, go through the General Lists article.
- Populate the list by clicking
 and type over the line. To delete a line from the list highlight the row and click
  .
. - View the list values on the Itinerary tab as shown below:
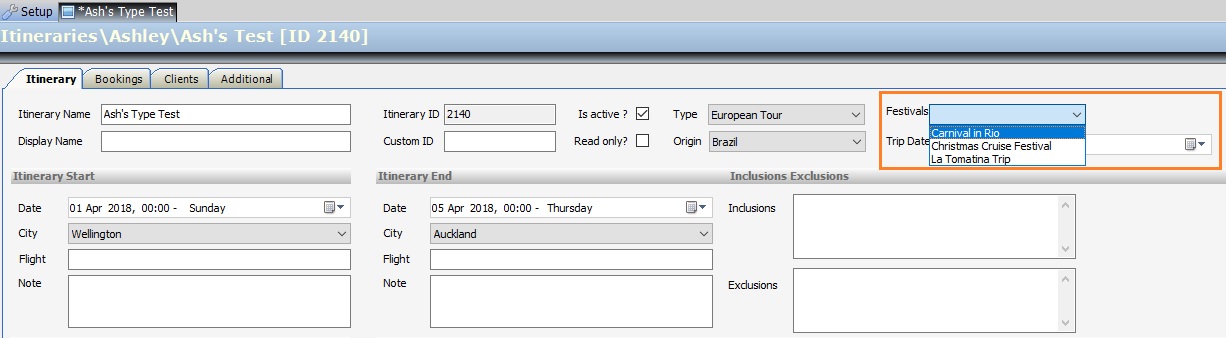
- Select a date for the new field as per the Tourwriter date convention.