Through Tourwriter’s integration with Axus, you can push a Tourwriter itinerary to your Axus account. Each user can store their Axus login information in the integration setup in Tourwriter. You can also re-push a previously pushed itinerary. Follow these steps to complete the integration setup:
Integration Setup
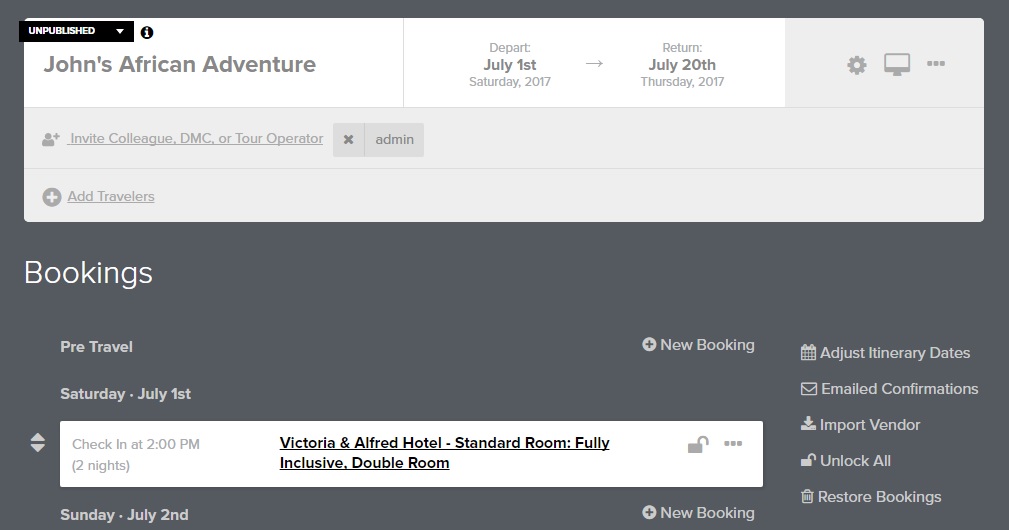
In Tourwriter, open any Itinerary.
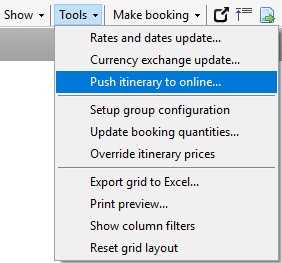
- Click on the Bookings tab
- Click Tools
- Select Push itinerary to online…
On the Upload Itinerary to Online screen
- Click on the Push to drop-down
- Select Axus

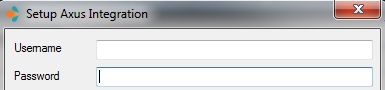
- Next, click Settings
- Type in your Axus Username and Axus Password into the fields provided.
Manage Bookings to Push to Axus
Tourwriter lets you hand-pick booking items that you’d like to exclude from pushing to Axus. You can achieve this with the Manage Bookings feature on the Upload Itinerary to Online window in Tourwriter. Additionally, for bookings that are selected to be pushed, you can choose whether the publishing content is pushed as well. Manage your bookings through the following steps:-
- Click Manage Bookings on the Upload Itinerary to Online window to open the Manage Axus Bookings window.
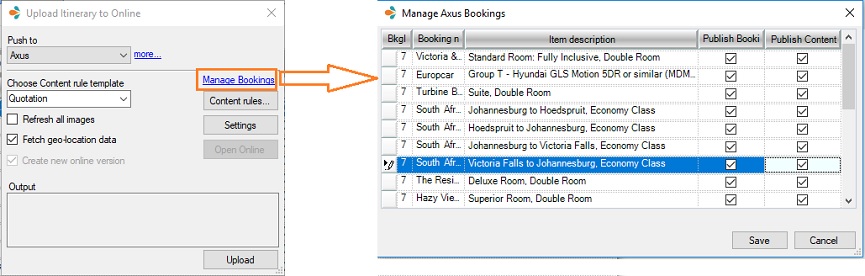
Note: The window will have all the itinerary bookings ticked by default.
- Untick the bookings to exclude them from being pushed to Axus. This unticks the Publishing Content checkbox as well.
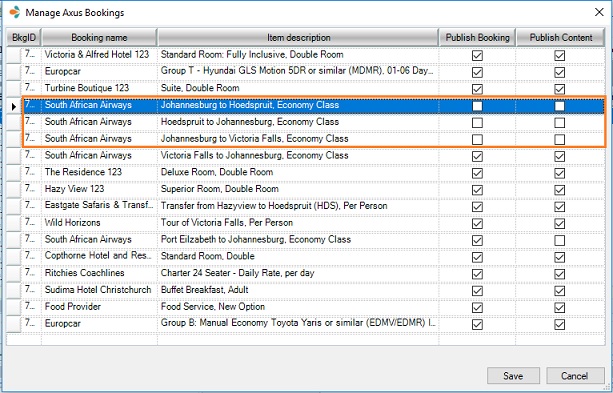
- Alternatively, you can push just the bookings and not the publishing content to Axus. Leave the Publish Booking checkbox ticked and untick the Publishing Content checkbox.
Configuring Settings in Axus
As part of the Axus integration setup, you’ll need to map your Tourwriter Service Types to Axus Reservation Types. More on this below.
Service Type Mappings in Axus
Tourwriter Service Types correspond to Reservation Types in Axus. The Reservation Types available for mapping are Concierge, Lodging, Rental Car, Tour, Train, Transfer and Other.
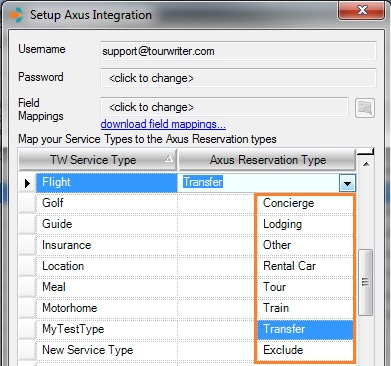
The Other Reservation Type should be used when there is no specific Axus Reservation Type that matches a particular Tourwriter Service Type. For example, the Service Type Meal can be mapped to Other Reservation Type.
The Exclude Feature
The Exclude option appears as one of the Axus Reservation Types. The Exclude Type simply gives users the ability to exclude bookings of a Service Type from what gets pushed to Axus. For example, say you have a booking to record an Insurance purchase in Tourwriter that you do not want pushed to Axus. You can map it to Exclude Reservation Type to prevent it from being pushed to Axus.
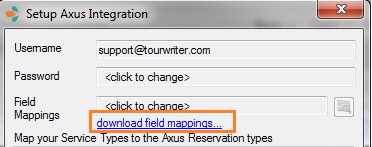
Axus Field Mappings
Field level mappings are used to map Tourwriter columns to fields in the Axus Interface. On the Setup pop-up window, you will see a setting below Axus Username and Password field called Field Mappings.
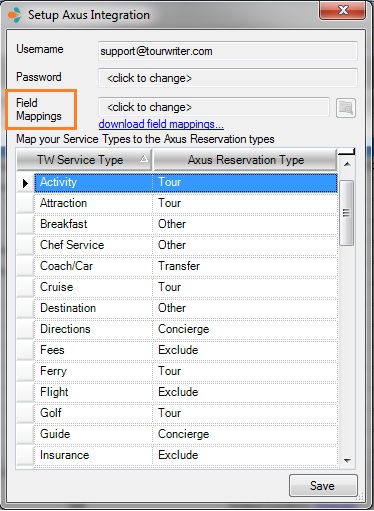
This setting comes preloaded with a default set of mappings. These can be downloaded, for review and modification purposes, to MS Excel in CSV (Comma Separated Value) file format.
- Click the download Field Mapping… link to download the CSV file to your computer.
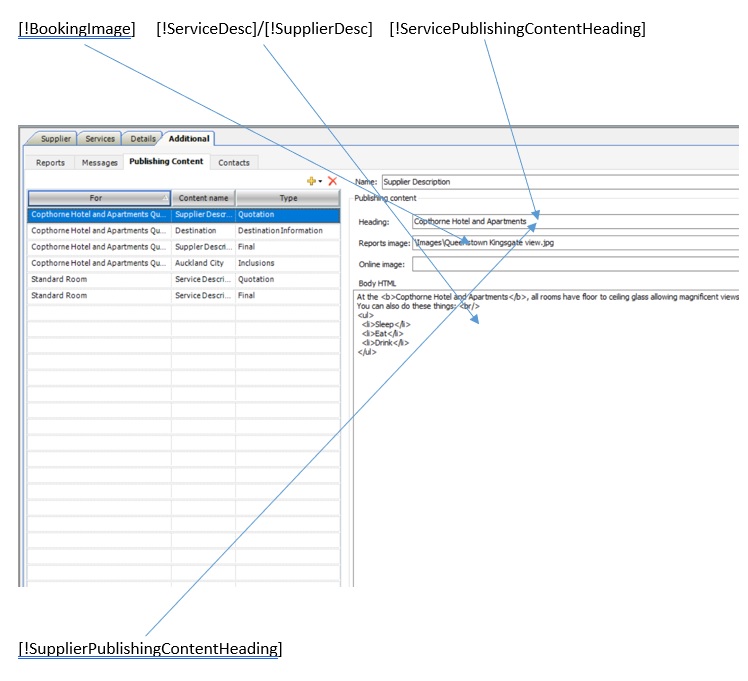
- The CSV file consists of 3 columns. The first column, Reservation Type, simply lists the name of the reservation type the field mappings are associated to. For example, a Reservation Type can be Rental Car, Lodging etc. The second column, Destination Field Name, lists Axus Fields associated with the Reservation type. The third column, Source Composite, should be populated with the corresponding Tourwriter field by way of a Tourwriter Tag. The downloaded file should look like the screenshot below.
The default CSV template is available to be downloaded here.
Note: The SourceComposite column is populated with Tourwriter Tags which represent Tourwriter columns in tag notation. These tags are the same as the Email tags used in Booking Email templates. A list of Tourwriter Email tags is available here – Email Booking Request Template Tags. To leave an Axus field blank, you can use the [!Blank] tag.
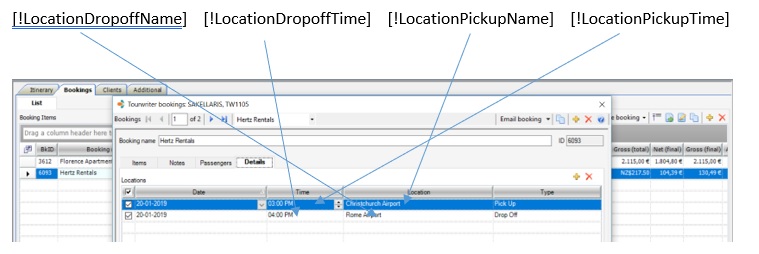
A tag used in the SourceComposite column maps a Tourwriter field to its corresponding Axus field. For example: In the screenshot below, for TourReservation Reservation Type,
we have the [!ItemStartDate] tag that maps the booking start Date field in Tourwriter to the startDate field in Axus.

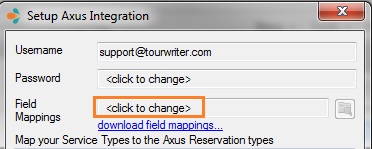
- After downloading the file, the field mappings can be edited to override the Tourwriter default mappings. Once the CSV file has been updated, upload it back into Tourwriter.
- To upload a CSV, click on the Axus Field Mapping Textbox.
- When clicked, a Tourwriter Message is displayed Do you want to use a new Mapping File?
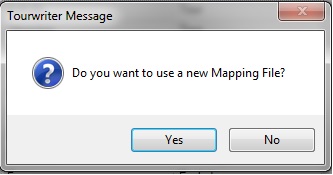
- Click Yes.
- To select a file from your computer, click the Folder Button next to the Axus Field Mapping Textbox.

- This will open a new Axus Mapping template window. Choose the CSV file to be uploaded.

- Locate the recently accessed CSV file and either double-click the file or click it once and select Open.
- Once the file is selected, click Save. The file will be uploaded to Tourwriter.

Uploading the CSV file is an optional step. If you do not upload a mappings (CSV) file, the default field mappings will be used during the ‘Push’ operation.
Content Rules for Axus
The Content Rules Engine allows you to define exactly which publishing content is pushed to Axus. You can create numerous templates for the different stages of your itinerary creation process, as well as set different rules for different languages or audiences.
Content Rule Template Setup
The steps to set up the Content Rules template is available here.
Note: On the Upload Itinerary to Online Screen, once you’ve selected the Template name from the Choose Content rule template drop-down, make sure you select Axus and not Travefy in the Push to drop down menu. Refer to the screenshot below.
The Sort Order field allows for additional content of the same type to be ordered. Find out more about this field here.
Image Specifications in Axus
Images pushed to Axus are recommended to have a size of 1500 x 600 pixels. High-Resolution images with high pixels, e.g. 3000 x 1200 will also work. However, using multiple high-resolution images will make the itinerary very heavy on the traveller’s cell phone storage space. The reason being, since the data of the trip, such as attachments, pictures, text, are available offline on the mobile app when the itinerary is downloaded, it is stored in the cache memory of the phone. The smallest image size permissible is 750 x 300 pixels.
Publishing a Tourwriter Itinerary to Axus
Once you have configured your Settings and created a content template, you are ready to push your Tourwriter itinerary to Axus. Perform the following steps to push your itinerary to Axus.
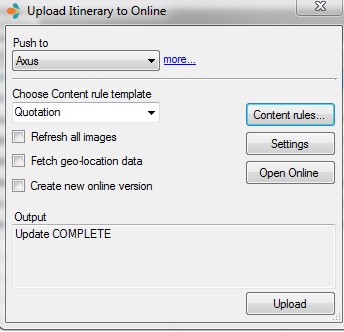
On the Upload Itinerary to Online screen,
- Make sure the Push to drop down box has Axus selected.
- The first time you push an Itinerary from Tourwriter to Axus, the Create new online version will be greyed out and ticked by default.
- Click Upload.
- Tourwriter will push the itinerary and open your Axus version in your browser automatically.
Note: Once you have pushed your Tourwriter itinerary to Axus, changes made in the Axus itinerary will not be reflected in the Tourwriter Itinerary. As your agent or client provides feedback on the itinerary, or you need to make any changes, it is important to make all changes in the Tourwriter itinerary before pushing again to Axus.
Republishing a Tourwriter Itinerary to Axus
The itinerary can be republished by performing the following steps:
- Open your Tourwriter itinerary.
- On the Bookings List, go to Tools > Push itinerary to online…
- Ensure Axus is selected from the Push to drop-down.
- Un-tick the checkbox – Create new online version. If the checkbox is ticked, the system will create a new Itinerary in Axus.

Note: It is important to note that as an easier option, select the Open Online button to re-launch the previously uploaded itinerary instead of clicking Upload. The Create a new online version checkbox should not be ticked if the objective is to push to an existing Axus itinerary.
The Axus Interface
And we’re done! Once you push your itinerary to Axus. your itinerary will be displayed in a browser.
Axus Map File Description