Agent labels are used to assign an Agent (e.g. parent company, overseas agent referrals, direct customer etc) to an Itinerary. This is useful when itineraries are created under the banner of another agent, allowing control over stationery (for example, the logo, header and footer text to be inserted on supplier and client correspondence and documentation) and pricing margins. When an agent is selected on the Itinerary Tab, the agent commission, or markup information loaded here, will automatically be inserted into the pricing area within the bookings list and the logo for that agent will appear on documentation, such as vouchers.

Default
Apply the Default (tick) to the agent from whom you receive the most bookings. If this is you, you may wish to set up a ‘Direct Customer’ agent, or your own company name as an agent, and enter the markup or commission and attach your company logo accordingly. This means that when a new itinerary is created in Tourwriter it will then not be necessary to select the applicable agent for this field (it will be assigned automatically).
Name
This field is used to list your client “types”.
Belongs to
This field allows a parent agent to be assigned to the agent.
Code
This is a unique system code which is automatically generated by Tourwriter.
Agent Subtab
To set up Contacts within each of the Names in your Agent Labels click on ![]() . This allows the user to allocate a specific contact to the selected Agent Label Name on the Itinerary Tab at Itineraries level. Fill out the New Contact card with an email address (Email 1 field) to enable emailing of final itineraries/emails etc. directly from the Tourwriter Application to the agent or customer.
. This allows the user to allocate a specific contact to the selected Agent Label Name on the Itinerary Tab at Itineraries level. Fill out the New Contact card with an email address (Email 1 field) to enable emailing of final itineraries/emails etc. directly from the Tourwriter Application to the agent or customer.
If you would like to attach an existing contact to an agent, simply locate the contact within the Contacts menu and drag into the Contacts area.
IMPORTANT – When loading data for the fields below, ensure you have the Name of the agent or customer that you are loading the data for, highlighted (in dark blue) the Agent Labels Name field.
Client texts Subtab
This field is used when specific Client text is required to appear on the Client Pricing Report or Client Detailed Pricing Report. Enter the applicable text in the Client texts – Itinerary footer Tab. For example, a good use of this field is to enter booking terms and conditions.
Voucher Texts Subtab
Header Subtab – This field is used to attach a link for an agent logo that will then display on vouchers etc. Please note that any logo should be around 6.15cm wide by 2.7cm high.
If the logo does not appear on the voucher, check that the file path entered in this field is still current (i.e. the location of the logo file has not been moved).
Footer Subtab – This field is used to load “Notes to be included on voucher”.
Margin overrides Subtab
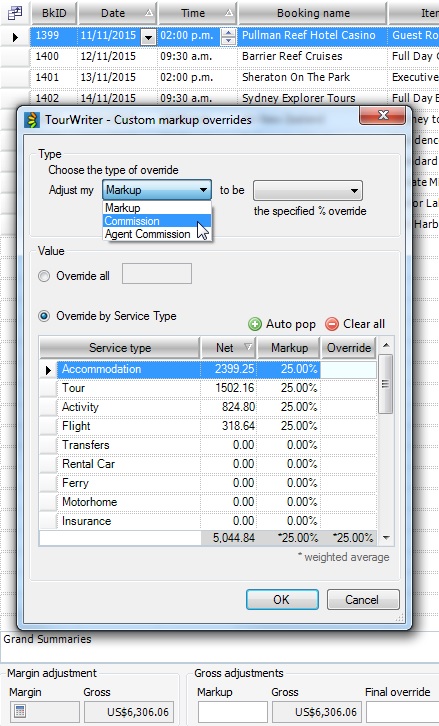
This section allows you to specify Default Margin Overrides by Markup OR Commission levels for each agent/ customer / client.
How to Set or Adjust Default Agent Markups or Commissions
- Highlight the applicable Agent in the Agent labels (top) workspace
- Select the Margin overrides Subtab
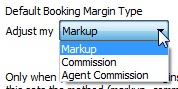
- Under Default Booking Margin Type you can choose to adjust either Markup or Commission by choosing your required option from the drop-down options next to Adjust my (shown below).
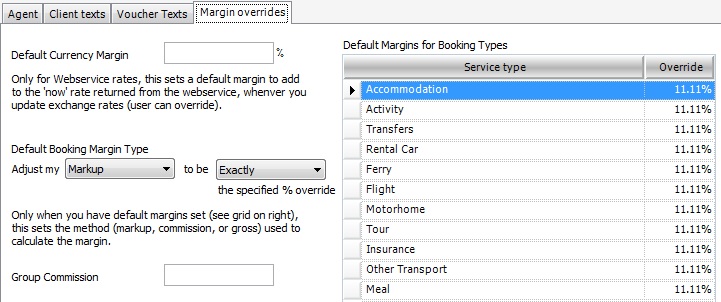
- In the Default Margins for Booking Types adjacent workspace populate or amend the Override field for each Service Type accordingly. These amounts will then either be your Markup percentage or your commission percentage depending on what you have selected as your Default Booking Margin Type (i.e. Markup or Commission).
- Repeat this process for each Agent Label Name.
NOTE – You may choose to leave the Direct Customer percentages blank - The Markups or Commission percentages you have set here, will automatically be applied to the booking prices for any Itinerary where this Agent is applied.
Please note that it is also possible to manage margin overrides for each individual itinerary elsewhere.