Location Cards can be added to the Location table, (i.e. specific branch location information) for the Supplier. A Location Card or Cards can then be attached at Itinerary level to an individual booking. Attaching Location Cards will trigger an Itinerary report to display different location and contact information to that which is set up on the Supplier Tab and also allows multiple pick-up and drop-off information to be displayed for that one Booking Item. This information can also be pulled through to the Booking Emailer.
How to Create a New Location Card
A brief overview of creating a new Location card is outlined below:
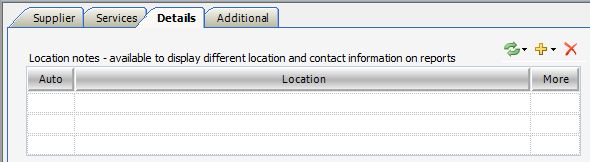
- Go to Supplier > Details Tab and click on
 above the Location notes workspace
 - A drop-down list will appear for the Supplier and Services that are available to add content against
- The first option at the top of the list will always be for the overall Supplier, the Services are listed below this. All Services are included in this list. This includes Non-Active (passive) Items in the Services list.
- Select the Supplier or required Service line. If you load Location information for the Supplier, this information will apply for the overall Supplier. If you load Location information for a Service, this information will only apply for this particular Service.
- A Location Card window opens, complete fields as required within the General Tab and click Save and Close. The new location will display within the Location notes table.
- If the Auto box is ticked this ensures the Location Card is automatically assigned to any bookings that include this Supplier or Service.
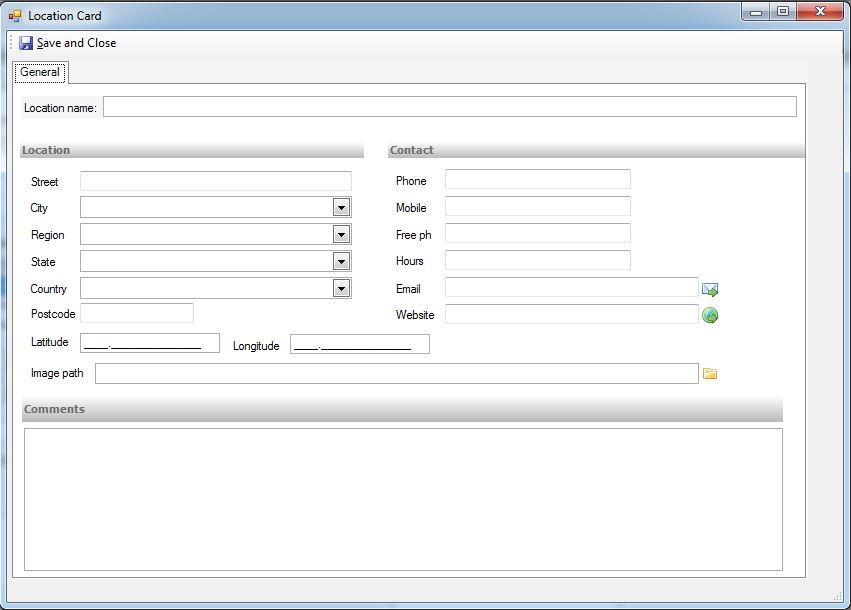
Location name
The Location name field allows you to apply a name to the Location Card so you know who the location and contact information belongs to and also to make it easy to find within the Booking Location Chooser popup window. The text entered in this field will more than likely display on reports so it is very important to have guidelines and use these to ensure report consistency.
Latitude and Longitude
Latitude and Longitude coordinates can be entered for the Supplier or Service.
Image Path
The Image path field allows an image to be attached to that particular location. This can then display on reports. Report images are saved in the TourwriterData\Images folder. To load an Image path:
- Click on the Folder icon next to the Image path field (see image above)
- Tourwriter will navigate to your TourwriterData folder
- Click through to the Images subfolder, locate image and select Open
- Tourwriter will attach the Image path
It is only possible to attach one image per Location Card. If a string of images is required (e.g. panoramic view), the photos will need to be stitched together in another editing program (e.g. Photoshop), saved as one JPEG and then it can be uploaded to the Tourwriter database.
Tourwriter cannot wrap text around images. For example, when including location information it is not possible to have a paragraph, image and subsequent paragraph. The image needs to be on either side of the paragraph.
IMPORTANT – The Images folder must be set up with a clear subfolder structure (good planning is important here). It is important to ensure that the folder structure you create will not need to be changed. If images are renamed or moved to a different folder you will have to reload the new Image path for that image (as the old image path will no longer be correct). An INCORRECT Image path can be identified in your Tourwriter reports by the presence of a small red x in the corner of the location where the image should be.
Comments
This field can be used to load additional information relating to that location such as special directions, check-in or other information specific to that Service. This field can be coded to appear on client Reports (documentation) that you produce from Tourwriter. This field can be enabled to allow HyperText Markup Language (i.e. HTML), however it is recommended information is entered as plain text. Reports using this field will then apply the correct font style and size, as determined by the report coding/scoping. We suggest that you avoid using bullet points and where possible keep details brief.
How to Add an Existing Location Card
In some instances, it might be possible to add an existing Location Card across multiple services within the one Supplier or across multiple Suppliers. A brief overview of adding an existing Location Card is outlined below:
- Go to Supplier > Details Tab and click on
 above the Location notes workspace to add an existing location for a Supplier or Service
 - A dropdown list will appear for the Supplier and Services that are available to add content against
- The first option at the top of the list will always be for the overall Supplier, the Services are listed below this. All services are included in this list. This includes Non-Active (passive) Items in the Services list.
- Select the Supplier or required Service line. If you add Location information for the Supplier, this information will apply for the overall Supplier. If you add Location information for a Service, this information will only apply for this particular Service.
- A Location Chooser popup window opens, locate the required location and click OK . The location will display within the Location notes table.
- If the Auto box is ticked this ensures the Location Card is automatically assigned to any bookings that include this.
Deleting a Location Card
A Location can be deleted out of a Supplier by selecting the Location and clicking on ![]() above the Location workspace in the Supplier > Details Tab.
above the Location workspace in the Supplier > Details Tab.
A Location can be deleted out of a Booking by selecting the Location and clicking on ![]() above the Location workspace in the Bookings Window > Details Tab.
above the Location workspace in the Bookings Window > Details Tab.
A Location can be permanently deleted out of the Tourwriter database by opening the Location Chooser popup window from any Supplier > Details Tab, clicking ![]() , then selecting the Location and clicking on
, then selecting the Location and clicking on ![]() . You will be prompted with a message notifying you that deleting this location will remove the location from any other Suppliers and bookings that it is currently attached to.
. You will be prompted with a message notifying you that deleting this location will remove the location from any other Suppliers and bookings that it is currently attached to.
Editing an Existing Location Card
Go to Supplier > Details Tab and either double click the selected Location or click within the More field to open the Location Card. It is very important to keep in mind that edits will impact all Itineraries that the Location Card is attached to.
Adding a Location Card to an Itinerary Booking
To add a Location Card to an Itinerary booking:
- Go to Itinerary > Bookings List
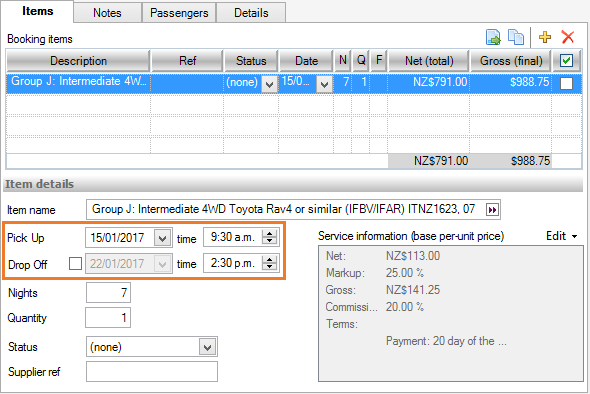
- Double click your chosen Booking Item to open the Tourwriter bookings window
- Complete the Pick Up and Drop Off dates and times in the Items Tab – This information will carry across to the Booking Details Tab, when loaded
- Go to the Details Subtab and click the yellow plus to open the Booking Location Chooser popup window
- Select the Location Card for this Supplier/Service from the pre-loaded options (to find out how to create locations, check out the Location Cards post) and click OK. The Location will display within the Details Tab workspace, including the Pick Up information as entered in the Items Tab

- If the date and time were not added to the Items Tab (step 2), you can add, or adjust, them here.
- When adding an additional Location card to the same Booking Item, simply go through steps 4-8 again. The Date, Time, and Type will automatically populate with the end Date and Time for the Booking, if loaded in the Items Tab
- Untick the box if you do not want the information to be displayed in Supplier booking emails
Allocating unique Date and Time information to a Location Card/s that has been attached to a Booking Item allows more detailed information to be provided to a supplier via the Booking Emailer or to a client on a report. For example, there may be only one Booking Item on the Bookings > List Subtab, but the Supplier will be provided with a breakdown of the booking itself (e.g. multiple pick-up and drop-off times/locations for one rental vehicle booking) and this breakdown can also be displayed in detail on reports.