Travefy is available for all Enterprise clients however there are a number of elements that need to be configured including the setup of an Online account and the enabling of your API connection.
If you are interested in accessing Travefy functionality please contact the support team (support@tourwriter.com) so we can implement a start date for you.
Once you do have access, please follow the steps below to get setup.
This Post Covers:
- How to complete the initial setup for Travefy
- Also check out the link to how to set up your Content Rules
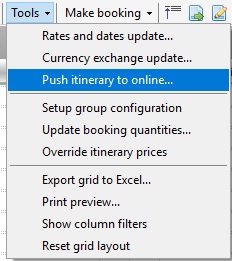
Push itinerary to online
Open an Itinerary and go to Bookings > Tools Dropdown > Push itinerary to online…
The Upload Itinerary to Online window will open:

Content Rules
Click on Content rules… to create one or more content rule templates. For setup steps, see Content Rules for Travefy.
Settings
Click on Settings to open the Setup Itinerary Push window:
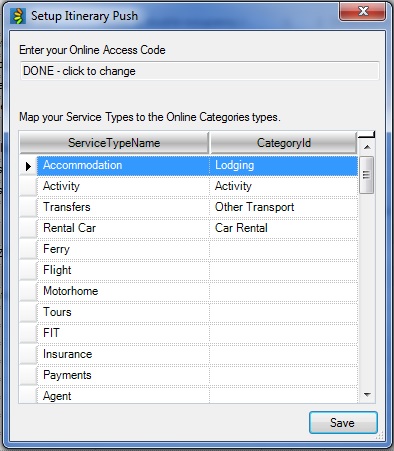
Here is where you will set up the Push to Online for your database. When signing up, you will have been provided with your unique Online Access Code. Please copy and paste this into the line at the top of the window (Access Code has already been applied in image above).
Next you need to map your Service Types to the categories in Travefy. This means, that you will be “telling” Tourwriter which category to display your information in. For example, link Accommodation with Lodging (as in above image). Under the ServiceTypeName field will be the Service Types loaded in your Tourwriter database, under CategoryId field (hover over field and use the drop-down list) is the fields available in Travefy.