
Itinerary Name
The Itinerary Name is the name of the party travelling. Think of a naming convention that is the easiest for your company to use as this is how the itineraries will appear and be sorted in the Itineraries Menu on the left. Last name, first name is the tidiest way of displaying; itineraries will then display alphabetically in your Itineraries menu by surname. e.g. Smith, John and Jane.
Display Name
The Display Name is pulled through to/presented on client documentation such as quotes, itineraries, vouchers, pricing documents and the Tourwriter bookings emailer. Think of how you would like your clients’ names to be displayed on their documentation, and to your suppliers at the time of booking. For example, your Itinerary Name might be ‘SMITH, John and Jane’, you may however, like your Display Name to be ‘John and Jane Smith’. If there is no Display Name loaded Tourwriter will default to the Itinerary Name field on client documents such as Quotations and Pricing reports.
Itinerary ID
The Itinerary ID is automatically generated by Tourwriter. Each Itinerary has a unique Itinerary ID. The itinerary ID can appear on client documentation for tracking purposes e.g. Quotations, Final Itineraries, Pricing documents and Vouchers. It is also an easy way to search for an Itinerary in the database by using the Search Form.
IMPORTANT: This ID cannot be edited. If your current numbering system includes a combination of letters and numbers, the Custom ID field could be used. When you sign up to Tourwriter, you can ask your Implementer to have your Itinerary ID’s start from a particular number. This can be useful if you have an existing number system in place, or if you do not want a client to think they are your first ever customer!
Custom ID
Only use the Custom ID if it is imperative for you to continue with an existing itinerary numbering system and the Itinerary ID is not suitable (e.g. one which includes a combination of letters and numbers) or to tie in with your existing accounting system, as it’s one less thing to complete during the Itinerary creation process.
Is active?
By default, all new Itineraries created in Tourwriter are active.
An itinerary can be deactivated as required, e.g. if a quote is provided but the agent/client does not confirm the booking. To deactivate an itinerary, untick the Is active? tick box, and a line will appear through the Itinerary Name in the Itineraries menu to the left, once you saved the change (CTRL S).
To reactivate an itinerary, tick the Is active? tick box, and save this change (CTRL S).
We recommend creating an Itinerary subfolder (e.g.Hold, Dead, Closed) to store deactivated itineraries. You can report on active vs. inactive Itineraries using the Data export feature – (Tools > Additional > Data import/export > Itineraries > Load). It is suggested you use the Is active? feature in conjunction with the Itinerary Status to ensure all management reporting is accurate.
Read only?
Once an Itinerary has been finalised and payment has been received, this box can be ticked to ensure further changes cannot be made to the Itinerary. Once the box has been ticked, a message pops up prompting you to save.
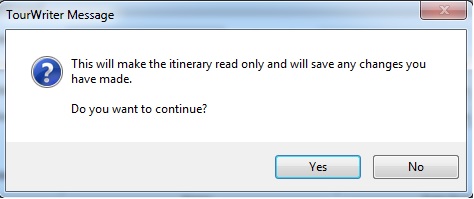
Selecting Yes to this message will grey out the Save and Save & Close buttons on the Toolbar, preventing the ability to save any future changes to the Itinerary. The ability for a user to enable/disable the Read only? tick box is controlled by User Roles permissions (Tools > Setup > Account Types). See Itinerary read only tick box in Permissions in selected Role field.
Type
This field allows the client to differentiate/customise itineraries. The list is customisable in Tools > Setup > General Lists > Itinerary types. List values (i.e.options) could be Package, Sale, Group, FIT, Guided, Self Drive.
With additional customisation, the Itinerary Type field can trigger certain information to appear on your publishing documents e.g. Quotations and Final Itineraries. For example, it could be used to define trip names, different Terms and Conditions, or pull through predetermined images on the cover page. It is recommended you discuss the use of the Itinerary Type field with your Tourwriter implementer, or the Tourwriter reports team, before making use of this field.
Origin
This relates to the country of origin of the people travelling on the itinerary, not necessarily where they have travelled from. To edit the Country list, go to Tools > Setup > Locations and add a Country by clicking the ![]() . Please note that States, Regions and Cities do not appear in this Origin drop down.
. Please note that States, Regions and Cities do not appear in this Origin drop down.
This field can also be coded to appear in Booking Emails to notify suppliers where their guests/clients are from. Adding Locations to the database can be controlled by User Roles – Tools > Setup > Account types, and select/deselect the Data lists setup tick box. Populating this field allows you to report on what markets your clients are coming from (Tools > Additional > General Reports > Client Locations).