The Itineraries section in Tourwriter is where users create and store information relating to a client’s booking.
Folder Structure
A good, clear folder structure for Itineraries and Suppliers is recommended. Common sorting methods for Itinerary folders include: by year of travel, with subfolders by month of travel, or by staff member in charge of that Itinerary. Itineraries will be automatically ordered alphabetically by itinerary name within each folder.
Creating Folders
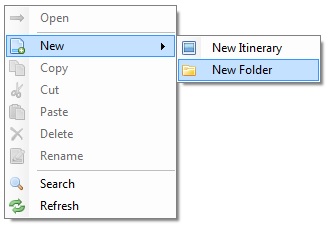
To create new top-level folders (to sit below the main Itineraries yellow folder), right click anywhere within the Itineraries menu and select New > New Folder. The folder that is created will be called New Folder, simply right click the New Folder and select Rename.
To create sub folders within any of your top-level folders, follow the same process as above: Right click the folder name, the folder that is created will be called New Folder. Right click the New Folder and select Rename.
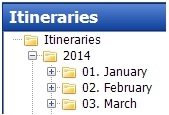
If you organise your folders by year and then month, use numbers to set the following folder names;
01. January
02. February
03. March…..
Tourwriter lists all folders and itineraries alphabetically, so this methodology places the months in calendar order (see example shown below).
Creating a New Itinerary/Supplier
There are several ways to create a new Itinerary in Tourwriter; from the toolbar and from the itineraries menu:
From the top Toolbar:
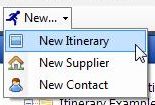
Select New… from the Toolbar, then select New Itinerary.
 A blank Itinerary template will be created in the top-level Itineraries folder in the menu. The Itinerary will then open in the workspace to the right. Enter the Itinerary Name and Save (CTRL S) or click the Save icon on the Toolbar. Move the Itinerary from the top-level Itineraries folder into the applicable Itineraries folder or sub-folder by selecting the Itinerary Name in the Menu and drag and drop the Itinerary into the desired folder or sub-folder.
From within the Itineraries/Supplier Menu:
Select the Itineraries or Suppliers Sidebar Menu.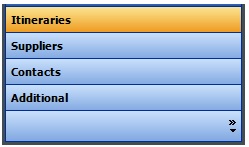 Select the folder in which the itinerary is to be stored, right click on the folder and select New > New Itinerary. A blank Itinerary template will be created in your chosen folder in the menu and the Itinerary will open in the workspace to the right. Enter the Itinerary Name and Save (CTRL S) or click the Save icon on the Toolbar.
Copying Itinerary Templates
To save time creating the same itinerary over and over you may prefer to create an Itinerary Template to work from as a base itinerary. To do this:
- Create an itinerary entering valid rates but be sure to select the Read only box on the first page and Save.
- File all templates in a dedicated folder for your staff to access easily e.g. Templates.
- Before you copy the template, we suggest closing the Itinerary.
- Locate the Itinerary in the Templates folder.
- Right click the Itinerary Name and select Copy.
- Right click the Folder you would like the copied Itinerary to be stored within.
- Select Paste (copy).
- Your Itinerary Name of the copied Itinerary will be appended with – Copy.
- Open the Copy, rename and edit the booking dates.
You will be prompted with a message to move booking and departure dates which will open the rates management screen. Provided you have valid rates for the updated dates your bookings will update. If you do not have valid rates a ![]() will appear and you will need to edit these manually. Should you wish to omit any services un-tick the box to the left of the supplier/service name. To find out more about moving Itinerary dates, please click on the following link: How to move Itinerary Dates .
will appear and you will need to edit these manually. Should you wish to omit any services un-tick the box to the left of the supplier/service name. To find out more about moving Itinerary dates, please click on the following link: How to move Itinerary Dates .