Database Backup
- Tourwriter will provide you with a backup copy of your existing online database (.bak file). This will be sent to you via email as an attachment.
- Save the .bak file to a location on your computer e.g. Desktop. This should be the computer you will be installing Tourwriter onto.
If the computer you receive the backup email on, is not the computer you will be installing Tourwriter onto, you can transfer the .bak file using a USB drive.
IMPORTANT – At this point your online database should not be accessed by yourself, or other staff, until the offline database setup (detailed below) has been completed.
Setup New Office Server (performed by the client):
- On the new computer / server, download and install Tourwriter: support.tourwriter.com/download
- When Tourwriter starts, (if you see Tourwriter Login window here, click Setup, then..) select Office Database
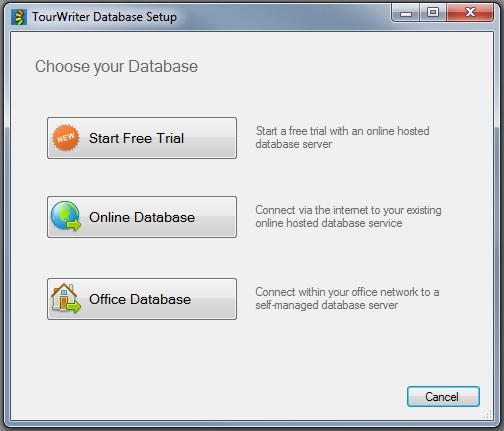
- Click Install Server Software
- Click Advanced Options
- Click the Choose my backup button and browse to the backup file (.bak) provided above
- Click the Install button at the bottom of the window and follow the prompts to complete the install. This process may take up to 10 minutes to complete
- Click the OK button
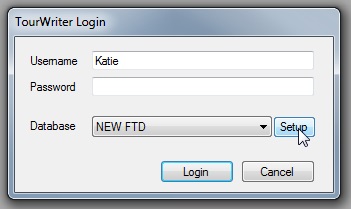
- At the Tourwriter Login window, click the Setup button
- Click Office Database
- Click the Search button and select your new Server Name.
- Click the OK button
- You can then login with your existing username and password.
Following this, connect each staff member’s Tourwriter application to your new locally installed database by completing the steps detailed below:
- On the staff computer(s), download and install Tourwriter: support.tourwriter.com/download
- Open Tourwriter
- At the login screen, click the Setup button
- Click Office Database
- Click the Search button and select your new Server Name.
- Click the OK button
- You can then login with your existing username and password.
Relocation or Creation of the TourwriterData Folder
You will also need to relocate or create your TourwriterData folder, which is used to store any customised email templates, reports and images.
For existing customers, locate the TourwriterData folder and copy all files to a location on your Server. You will need to relink your TourwriterData folder to your Tourwriter database, refer Step 2 from this article.
For new customers, who do not yet have a TourwriterData folder, please follow steps provided in this file for setup info: TourwriterData folder setup instructions.
Once you have completed all of the above steps, and you have logged into your Office Database, please contact your Tourwriter Customer Success Executive to ensure your online database is switched off and our billing records are updated accordingly.