In Tourwriter, you can predefine the list of Countries that your Agents, Suppliers and Clients are based in. Each Country is divided into States, Regions and Cities. The Tourwriter Database comes with thousands of preloaded Countries, States, Regions and Cities.
In this section we detail the process to follow when adding additional Countries, States, Regions and Cities in the Tourwriter Database.
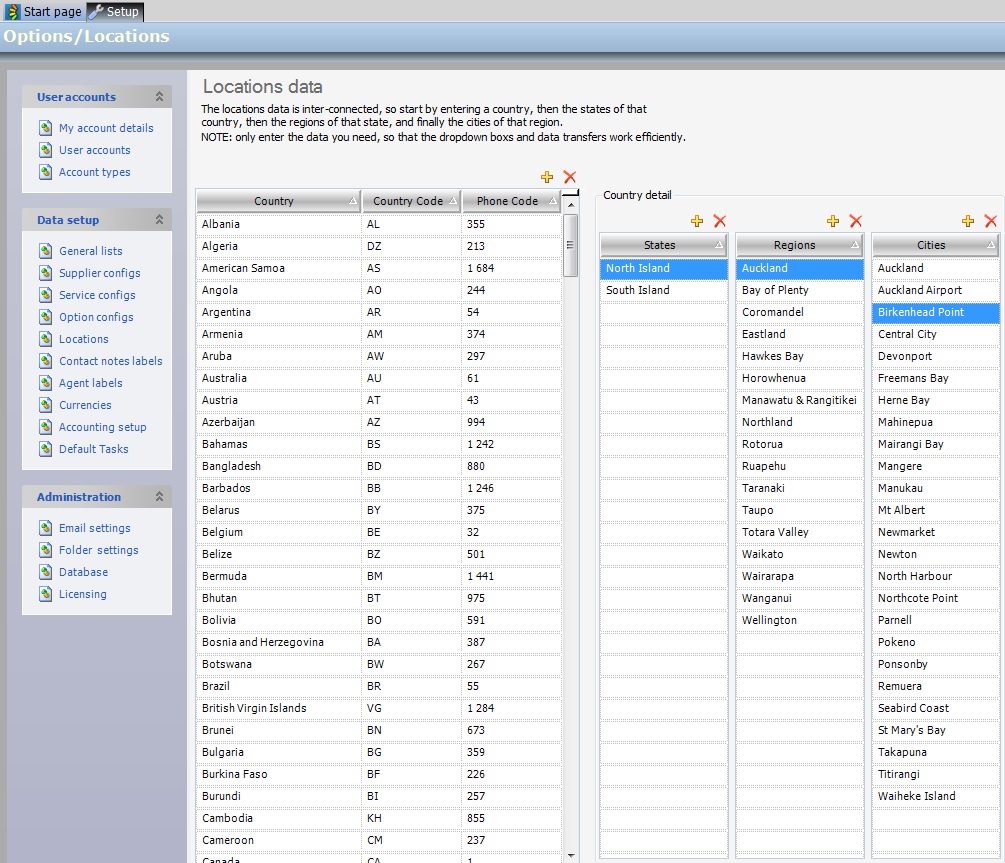
The Locations data is interconnected, so working from left to right, start by entering a Country, then the States of that country, then the Regions within the State, and finally the Cities within the Region. Populating these fields will ensure that when loading the data for a new Supplier, once the City has been selected on the Supplier Tab, Region, State and Country fields will auto-populate.
Locations data also populates the options available to you in the Origin field (i.e. Client country of origin) on the Itinerary Tab in an Itinerary. It will also appear on vouchers and client itinerary reports.
Some Countries do not necessarily have States, Regions and Cities; to leave any of these fields blank, press the spacebar once and then move across to the next field. Consider how you would like this information to display before entering at Setup level.
Please note that the wording in the Tourwriter Application cannot be altered, if the terms States, Regions or Cities do not apply to the country you are loading (e.g ‘Province’ is more appropriate), we can amend this in any of these names in your Client documentation (e.g Quotations, Itineraries, Invoices, Contact Lists). Just talk to your Tourwriter Implementer or Customer Success Executive at the time your reports are being developed to request this.
IMPORTANT – We recommend you do not delete any of the preloaded Cities, Regions or States from the Database, unless you are sure these have not been already applied to your Suppliers or Contacts. If this information has been used within a Supplier or Contact Card the applicable fields will revert to number values (which represents a deleted location).
Adding Locations Data
- Go to Tools > Setup > Locations
- Select the Country you would like to add to by highlighting it in the list on the left. If your Country is not present in the list, click the
 at the top of the Country field. Overtype the ‘New Country’ text with your Country name.
 - Decide how your Country is best organised/divided in Tourwriter.
There are three levels:- States: This is the top level
- Regions: This is mid level
- Cities: This is the lowest level available in Setup
- Please note that in order to load a City, you must have first defined and loaded its Region and State.
- To add a new State, ensure the correct Country is selected. Click theat the top of the State field. Overtype ‘New State’ text with your State name.
- To add a new Region, ensure the correct State is selected. Click theat the top of the Region field. Overtype ‘New Region ’ text with your Region name.
- To add a new City, ensure the correct Region is selected. Click theat the top of the City field. Overtype ‘New City’ text with your City name.
Applying Locations to Suppliers
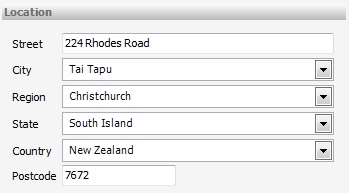
The main Supplier contact information, including Location details, are stored on the first Supplier Tab of a Supplier. Type the Supplier Street address manually. Next, apply the City by clicking the arrow to the right of the City field, or by typing the first few letters of the City name. Once the City is selected, the Region, State and Country will automatically populate, based on the information loaded in Tools > Setup > Locations.
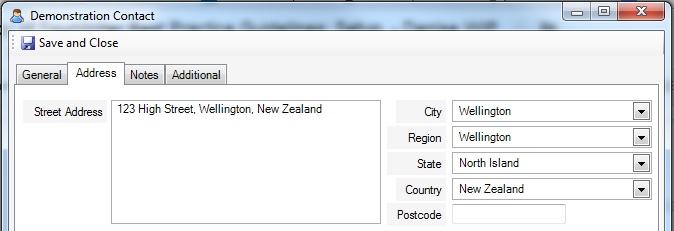
Applying Locations to Contacts – Agent Contacts, Supplier Contacts and Client/Passenger Contacts
Each Contact Card created in Tourwriter has an Address Tab containing Location fields. Complete the Street Address (typically one line, but can span two or three if required). Then apply the City by clicking the arrow to the right of the City field, or by typing the first few letters of the City name. Once the City is selected, the Region, State and Country will automatically populate, based on the information loaded in Tools > Setup > Locations.
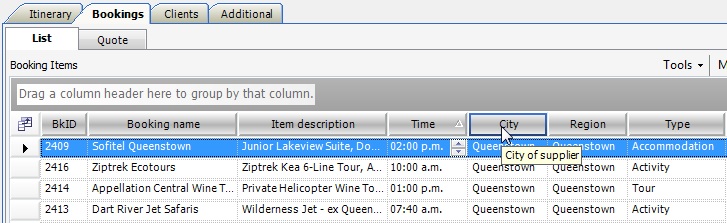
You can also enable the City and Region fields in the Bookings List Tab by clicking the field chooser icon ![]() to the left of the BkID field. Select City and Region from the Field Chooser list, and drag + drop the fields into your preferred order within the Bookings List grid. These fields gives you a good overview of where your clients are travelling.
to the left of the BkID field. Select City and Region from the Field Chooser list, and drag + drop the fields into your preferred order within the Bookings List grid. These fields gives you a good overview of where your clients are travelling.